Showing posts with label toddler. Show all posts

Wednesday, June 26, 2013

Toddler Friendly Bathroom

When most of our renovation zone house was safe enough and my daughter moved upstairs with us 3 weeks ago, we brought up her old potty chair and an underbed storage container that we've used for 2 years as her "within-bathtub-tub."  In our 5 x 8 bathroom, these two items were functional clutter.  I knew they were helpful for us, but I'd have to move them from place to place to access things we needed.  We resolved these issues by purchasing two products and love the improved function they give us and the instant return to less clutter on our bathroom floor.


1:  The Potty... Pooper

Problem:  Our daughter's potty chair was hard to rush to and also blocked the hamper area of our bathroom
Solution:    BEMIS NextStep Elongated Closed Front Toilet Seat in White ($52.62 via Home Depot)


It's a strange thing to say, but I truly appreciate that
toilet seat.
First, I considered replacing the original seat that came with our Kohler Santa Rosa one piece toilet because it got scratched fairly well while we renovated the bathroom and didn't think to protect it.  I didn't count the number of times I dropped a drill on it, but it shows.  :)

We splurged a little and used our Home Depot consumer credit card to purchase a quiet close toilet seat that had a toddler sized potty seat attachment.  Now, our daughter's potty is integrated with our potty, and as a bonus, the larger seats do not slam (although the toddler seat can).  Also, the toilet seat can be easily unsnapped from the toilet, making our one piece toilet even easier to clean.  And the best part is, since I used my HD card, I can pay for this seat over 6 months.  Basically, for less than the price of a restaurant lunch every month ($10), we were able to solve our potty problem.


The toilet itself is still too high for my daughter, but at least rushing with her into the bathroom doesn't require hitting my knees on obstructions like the shower anymore.  If only we can solve the potty training problem, we'd be golden.  :)


2:  The Non-Bathtub Tub
Problem:  Our daughter was outgrowing her underbed storage container "tub" and our bathroom had little space to store it.
Solution:  OXO Good Grips Tub Stopper ($8.99 via Amazon)


Most people choose a bathtub in the bathroom, especially if they have children, but bathtubs have only made me nervous when it comes to our daughter.  The sides are too high for her to step over, tubs are made of hard, dangerous  material, and they can easily fill up with too much water.  All of these safety hazards were a concern, so when my husband spotted a corner shower, with a low shower pan and design we loved, we did not hesitate to pull out our old tub (repurposing it as a planter outside), and install a shower.

"After" the tub stopper.  Less clutter, more space.
Our daughter certainly outgrew her little storage tub now that she is 3, and it struck us that the entire shower pan is liken to the perfect kiddy pool.  It has low walls, but high enough to hold 2-3 inches of water.  It is wide enough for our toddler to bathe and play in and there are doors to keep the splashing contained.  All we needed was a tub stopper, and the OXO Good Grips one works so well for us for little extra money.  All I do is cover the drain with the silicone stopper and fill the shower pan with water, close the shower door, and let my daughter swim in her pool.

Especially since it is summer, I let my daughter get as dirty as she wants outside and when it gets the hottest, between noon and 2, I tell her it's "pool time."  The stopper keeps the water in, and when she's done, she moves it out of the way and drains the tub herself.  She "swims" and splashes without reserve leaving a happy toddler and happy mommy.  :)


Who would have thought that with a stopper, a corner shower would be THE best toddler "tub" ever for us.

Sometimes, a well-timed purchase makes all the difference and these two purchases turned our "adult" bathroom into one perfect for our toddler.  :)

Friday, June 21, 2013

Toddler Book Ledges

Today my daughter had a field trip with my mom and brother as they went out to eat lunch.  I haven't revved up any of my saws since I've been at home watching her, so this was an ideal time for me to get a quick project completed.

In 3 hours, I made these two simple book ledges from first cut to installation and you could too.

I made these shelves with leftover lumber from our coffee table build, which included a 1x4 for the back, a 1x2 for the bottom of the ledge, and a 1x2 for the front of the ledge.  I originally saw ledge plans from Ana White's $10 ledges.
 Materials:
2 - 1x4 @ 28 3/4 inches (already owned, paid $0.40)
4 - 1x2 @ 28 3/4 inches (already owned, paid $1.00)
Miter saw, wood glue, clamps, brad nails, hammer, nail set, wood filler, sander, paint, paint brush, drill with 3/16 bit and Phillips head bit, wood anchors and screws, level, and pen.

Procedures:
I wanted to fill the space between my daughter's bedroom door while open and her crib, and we also needed to start adding storage space in her room.  Thankfully, I found two leftover pieces of 1x4 that would be a perfect fit for the space.  I cut all the wood to the same length, then applied wood glue to one side of a 1x2 and clamped it to the 1x4 so it was shaped like an L.  I used brad nails I had to attach the pieces, because the 1x2 was too short a piece to need pocket hole screws.  I then attached the second 1x2 to the base 1x2 so the side piece looked like a J.  I counter sinked the nails, then wiped up excess glue.  I then repeated these steps for the second ledge.


I applied a natural wood filler, sanded the piece smooth, then used Olympic No-VOC semi-gloss (straight from the can, without custom tint) to the ledges.


Once the paint was dry enough (since I was working in a 3 hour window), I brought the ledges to my daughter's room and checked for fit between her crib and door.  I marked where I wanted the shelves to be, held each shelf against the wall, and after using a stud finder to locate studs, electrical wire, and the lack of studs, I drilled pilot holes through the ledge and through the wall.  Then, I screwed in wall anchors that could be used in drywall and wood.  I placed screws in the ledges deep enough so I could match them with the wall anchors in the wall, then drilled them in place, slightly countersunk in the ledge.  Now the unused space between the crib and the door is a functional storage space.


My daughter came home at the perfect time: right after I drilled in the last screw.  She excitedly helped me pick out books of the week, including 2 of her library books and a puzzle we made together, and helped me arrange them on her new ledges.


I love how we still have access to the electrical outlet, but the ledges are trim enough to not be an obstacle upon entering the room.


Immediately, she set to work using her new book ledges for some excited book browsing on her bed.

In the amount of time it took my mom, brother, and daughter to go to the mall and eat out, I was able to create two book ledges for my daughter's room for less than $2 of reclaimed lumber.  :)  I'd say this was worth it!


Toddler Closet Curtain

Hang a toddler's closet curtain easily using 1" cup cooks and a dowel.

Hang a curtain in a small closet using cup hooks and a dowel

Tuesday, March 12, 2013

3-Year Old Art

We are planning to make our own wall art: abstract paintings and completed puzzles we purchased from Savers for $1 are in the plan.  So far, nothing "artful" is mounted on our walls, but this will change next week.  My 3-year old daughter's art will be the first work to hang in our abode.  :)

While I was painting our living room floor cloth, I gave my daughter an opportunity to paint a throw away piece of subfloor that we removed from the living room floor and had to replace with new plywood.  While I painted, she naturally wanted to paint too, right beside me, and so she did.  After I completed the floor cloth, she would join me upstairs on the weekends and add layers of color to her painting.


It wasn't a coincidence that the colors went well together, although it wasn't part of a plan I had either.  I simply gave my daughter a connected set of craft paint pots in cool colors.  I didn't expect her to fill the subfloor piece with color, nor did I expect to want to keep the piece of subfloor I removed.  But, I love the artwork she made and I'm planning to give it a home on our hallway wall.

Toddlers are abstract art naturals!
Last weekend, my daughter was eager to continue painting, but all of the cool colored paints in the craft paint kit had been exhausted.  Since the subfloor piece was still there, I simply flipped it over and gave her the second set of craft paint pot colors in warm tones to use.  I figured that if she started a painting on the back, it could remain hidden when I mounted her cool colored art on the wall anyway.  Then, after just 30 minutes of painting, she had completed this:
Another piece of toddler abstract art.  Such a pleasant surprise, again!
While my daughter painted, I was painting the untouched window trim in our kitchen.  The grubby trim could be observed from my kitchen track light installation, although I am pleased to say, the grubbiness is no more and the trim is now awash in fresh white paint.  At the end of her painting, my daughter called my attention.  I was feathering off the last few strokes of paint on the trim, so I told my daughter I would help her in just a few seconds.

To keep her occupied, we sang the waiting song from Daniel Tiger's Neighborhood that says, "When you wait, you can play, sing, or imagine anything!"  I sang this to her three times, to which I heard her dancing and singing along.  I finished my feathering off and turned around to address what she needed help with.

Then, I saw this:

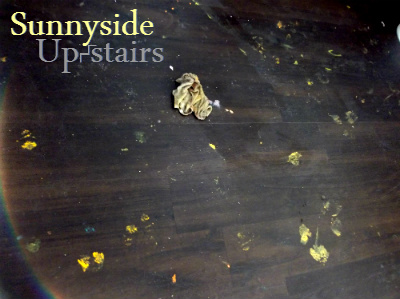
My daughter was dancing, all right.  She was dancing on her painting with her sandals, and dancing her painted sandals all around the kitchen flooring.


The pattern on her soles can be faintly seen in her painting, as pictured here:

It took just a few seconds for my facial expression to change. One look at my face and my daughter ran away further into the apartment, laying more orange footprints with her. After seeking her out to remove her shoes and prevent further damage, I laughed to myself at the humor of the event.  Of course, through my toddler, God gave me an opportunity to see the humor in a quiet afternoon with a 3 year old, even in scrubbing orange paint footprints off of our floor.

Now my only predicament is:  What side should I display?  I wish I had given her another piece of wood so I could mount both!  Any ideas for how I could make this reversible?

Sharing @ Remodelaholic