
Since we moved upstairs and had brought our projector and all the accessories home, we had to re-purpose furniture we built previously to keep electronics off the ground. We used our scrap wood end tables for the front and our herringbone entryway console for the rear gear.
As I was cleaning the garage, I noticed I had a pile of reclaimed 2x4s left from my Re-Use Hawai'i purchase. I thought it was about time I put our herringbone console back near the kitchen entryway and build a rear console.

Materials (Unless noted, I owned most of the things I needed for this build)
Process


The photos I took of my process after this point were too dark to be of any use. There are two big things I need to work on with building: 1) Build during the day and 2) Use the garage, not the kitchen, for building furniture.
I basically built the two legs and stood on them for a few minutes to make sure the joints were strong. Then I lay the legs down and attached 4 foot long 2x4s at the top, and a 2x4s width from the bottom, liken to the herringbone console table leg construction.
The next day, I re-evaluated my pile of 2x4s and noticed I had mostly shorties left. I decided to make a slatted bottom shelf using some of these 2x4s.


I decided I would use the 1x3 as a spacer, so I could space out the slats on the bottom "shelf" of the console.


In the late evening, I had the 2x4 rear console assembled, but I waited until morning to take a photo. The top 2x4 in the foreground has been weathering outside in our backyard for years. Now it is part of our living room. :) I enjoy the process of giving tired things purpose.
By this point, two days had passed, and over the span of 4 hours, I cut, drilled, and assembled this piece of furniture. It is built similarly to our herringbone console, but that slatted shelf makes it have its own style. :)
Materials (Unless noted, I owned most of the things I needed for this build)
- 30 ft of various length 2x4s ($0.25 shorties + 4 ft. boards $6 from Re-Use Hawai'i)
- Glass jalousies
- Flooring T transition strips
- 2-1/2" pocket hole screws ($4 from Lowes)
- Miter saw
- Kreg Jig Jr. drill bit, driving bit, and jig
- Great Neck C clamp
- Hitachi cordless drill
- Titebond III wood glue
- 4' Irwin clamp
Process
The photos I took of my process after this point were too dark to be of any use. There are two big things I need to work on with building: 1) Build during the day and 2) Use the garage, not the kitchen, for building furniture.
I basically built the two legs and stood on them for a few minutes to make sure the joints were strong. Then I lay the legs down and attached 4 foot long 2x4s at the top, and a 2x4s width from the bottom, liken to the herringbone console table leg construction.
The next day, I re-evaluated my pile of 2x4s and noticed I had mostly shorties left. I decided to make a slatted bottom shelf using some of these 2x4s.
I decided I would use the 1x3 as a spacer, so I could space out the slats on the bottom "shelf" of the console.
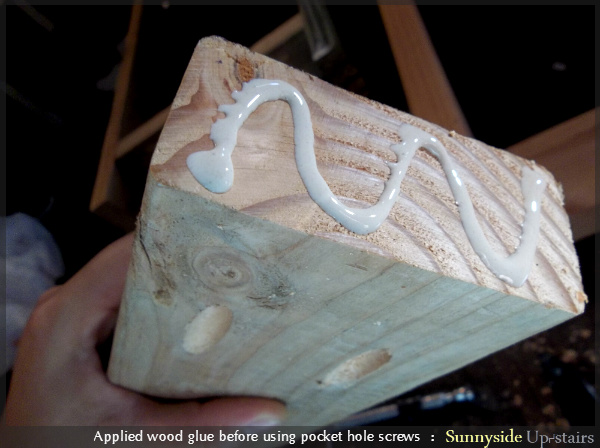
I brought the wood upstairs and tended to dinner and other mommy and wifely duties. It was late in the evening when I got to drilling pocket holes again while we had some family home theater time.
By this point, two days had passed, and over the span of 4 hours, I cut, drilled, and assembled this piece of furniture. It is built similarly to our herringbone console, but that slatted shelf makes it have its own style. :)


No comments:
Post a Comment
Let's start a conversation. Seeing comments makes me want to do a jig. I love hearing from you, so please remember to leave your mark here. :)